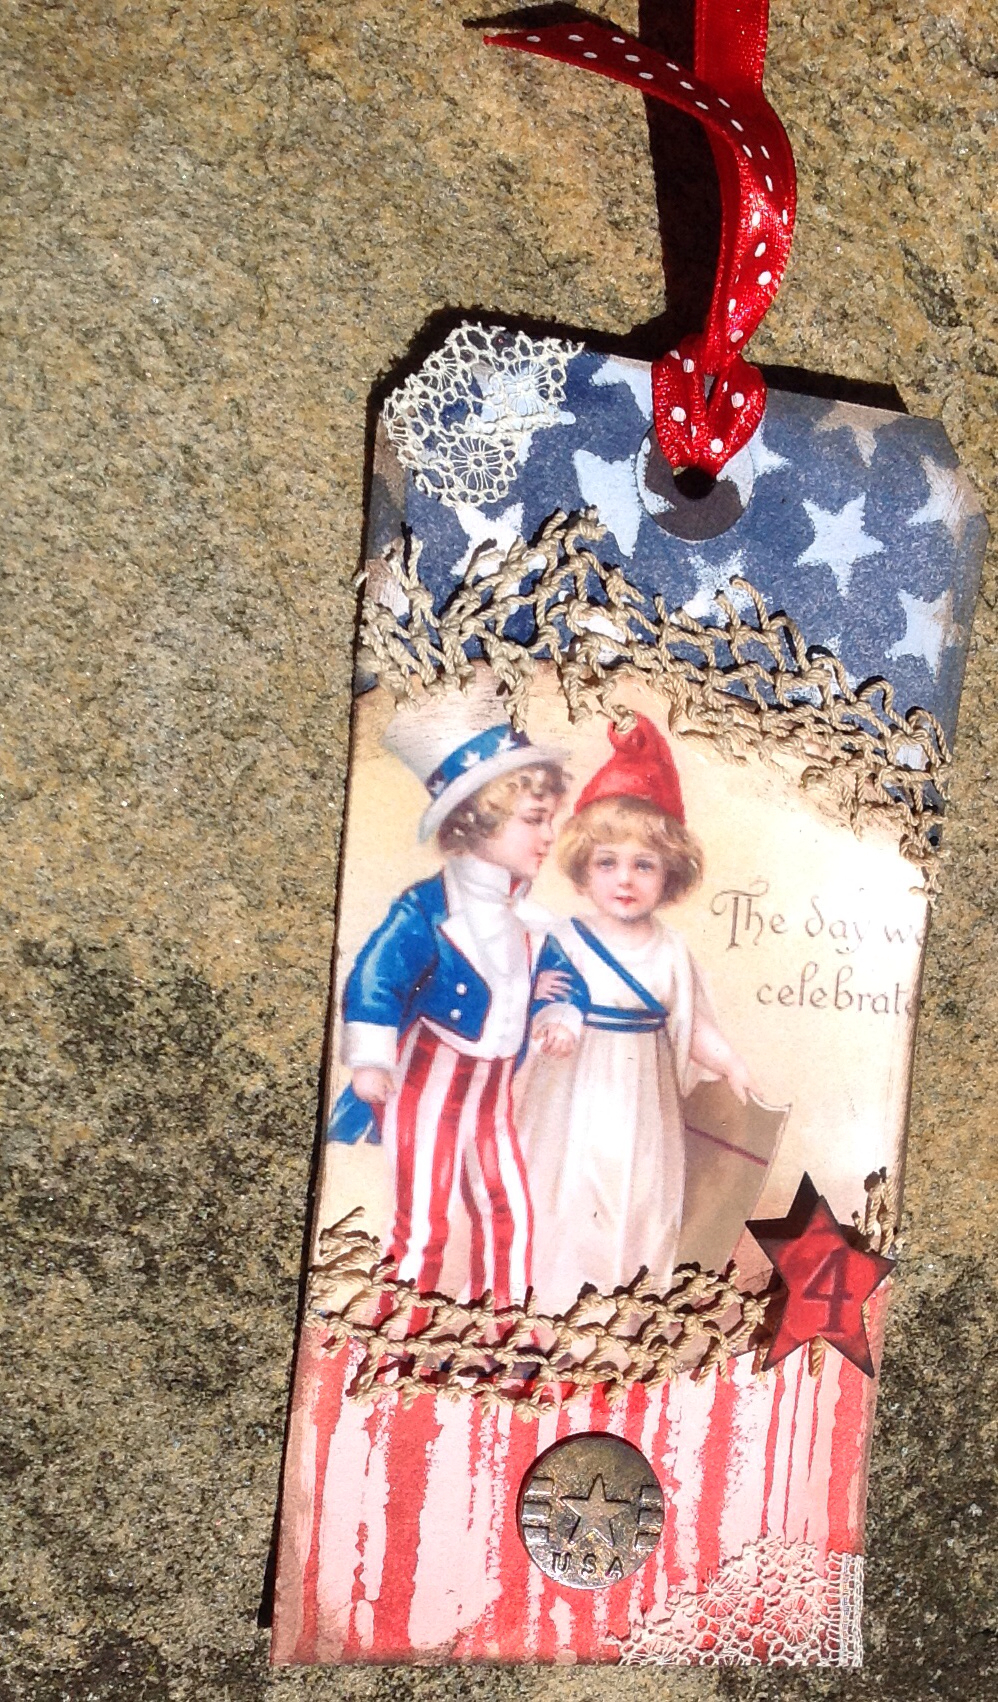
In the mail last week I got some new stencils by Tim Holtz. I love these stencils. I wanted to create something special with them. Though it is not 4th of July I was inspired by the Stripe and Star stencils. So I created this tag below. Stencils are great. You can easily create patterns on surfaces using lots of different medium. Today we will be experimenting with using gesso as a resist medium. The reason I like using gesso versus white paint is that gesso has more grit to it creating more interest in the final piece.
 Supply List:
Liquitex Gesso
Tim Holtz Layering Stencil; stars, stripes
Star punch or die
Distress Stain; chipped sapphire, festive berries, antiqued bronze, black soot
VersaColor; Pinecone
Patriotic vintage postcard
Various bits of vintage lace,net
Red dot ribbon
Star button or brad
The Ultimate Glue
Ranger non stick craft sheet
Foam applicator
Manila tag
Lightly moistened paper towel

 Directions:
Take star stencil and apply gesso with a foam brush to half of the manila tag.
 Repeat on other half of tag using the Stripe stencil. Let dry
 Quickly apply Festive Berries Distress Stain to the Stripe surface of tag. Be careful not to get red on Star surface. Take a moist paper towel or craft sponge and wipe paint off the raised gesso stripes.
 Apply the Chipped Sapphire Distress Ink to the Star stenciled area. Carefully remove excess from gesso area with a moist paper towel to reveal the white below. Dry.

 Cut out image from copy of vintage postcard below. Cut out the number 4 with star punch or die.

 Use Pinecone VersaColor cube to color edge of images and tag. Apply image to tag using The Ultimate glue.

 Make a small hole at the bottom center of the card and place the star button brad in the hole.

 Put red dot ribbon through the top hole of tag. Take the antique lace net and cut bits from the edge. Glue around the circle part of postcard image with The Ultimate glue. Let dry.
 Add more bits of antique lace to corners of tag. Place 4 from the postcard on tag.


Liquitex Gesso
Tim Holtz Layering Stencil; stars, stripes
Star punch or die
Distress Stain; chipped sapphire, festive berries, antiqued bronze, black soot
VersaColor; Pinecone
Patriotic vintage postcard
Various bits of vintage lace,net
Red dot ribbon
Star button or brad
The Ultimate Glue
Ranger non stick craft sheet
Foam applicator
Manila tag
Lightly moistened paper towel


Take star stencil and apply gesso with a foam brush to half of the manila tag.


Color the star button brad with Distress Stain in Antique Brass Gently apply a little black Soot to antique the surface.


8 comments:
fabulous tag- love the tutorial too!
Great tag Cora, and thanks for the tutorial - I have used modling paste for stencils - I must try gesso.
Blessings
Maxine
Great job!
I love this gorgeous tag, Cora; and I really enjoyed your tutorial!!
This is fantastic!!!
Thanks for this beautiful tutorial.... I pinned it on Pinterest, so I can find it back!!
Greetings,
Toos
I love the use of both stencils! Your tutorial is very detailed. Great sample! Thanks so much for that!
Awesome tutorial and tag! Thank you!
Post a Comment